From Paper Menus to a Digital Presence: How Chicken & Chips Food Truck Did It for Free
5 min read · Digital Menus · Food Trucks & Restaurants
Running a food truck is a hustle. You're managing the cooking, the queues, the restocking — the last thing you want is to spend money on printing new menus every time you change a price, add a seasonal special, or a customer accidentally walks off with your laminated card.
That was the reality for the team behind Chicken & Chips, a busy street food truck. Paper menus were a constant pain: outdated prices, worn-out copies, and zero digital presence. When someone searched for them online, there was nothing to show.
They solved it in under 30 minutes using Menuboard Online — completely free.
The Problem With Paper Menus
Paper menus seem cheap until you factor in the real cost:
- Reprinting every time prices change — ingredients go up, margins change, a reprint is inevitable.
- No online presence — customers can't find your menu before they arrive.
- No QR code sharing — you can't drop a link in Instagram, WhatsApp, or Google Maps.
- Wear and tear — rain, grease, enthusiastic kids. Menus don't last.
A digital menu eliminates all of this in one move.
What Chicken & Chips Built
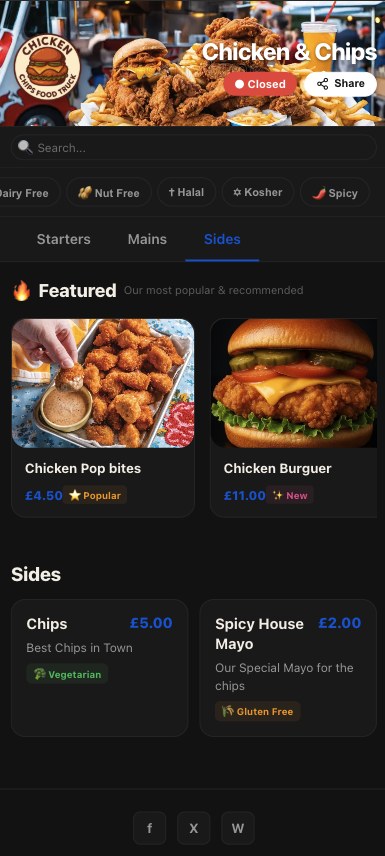
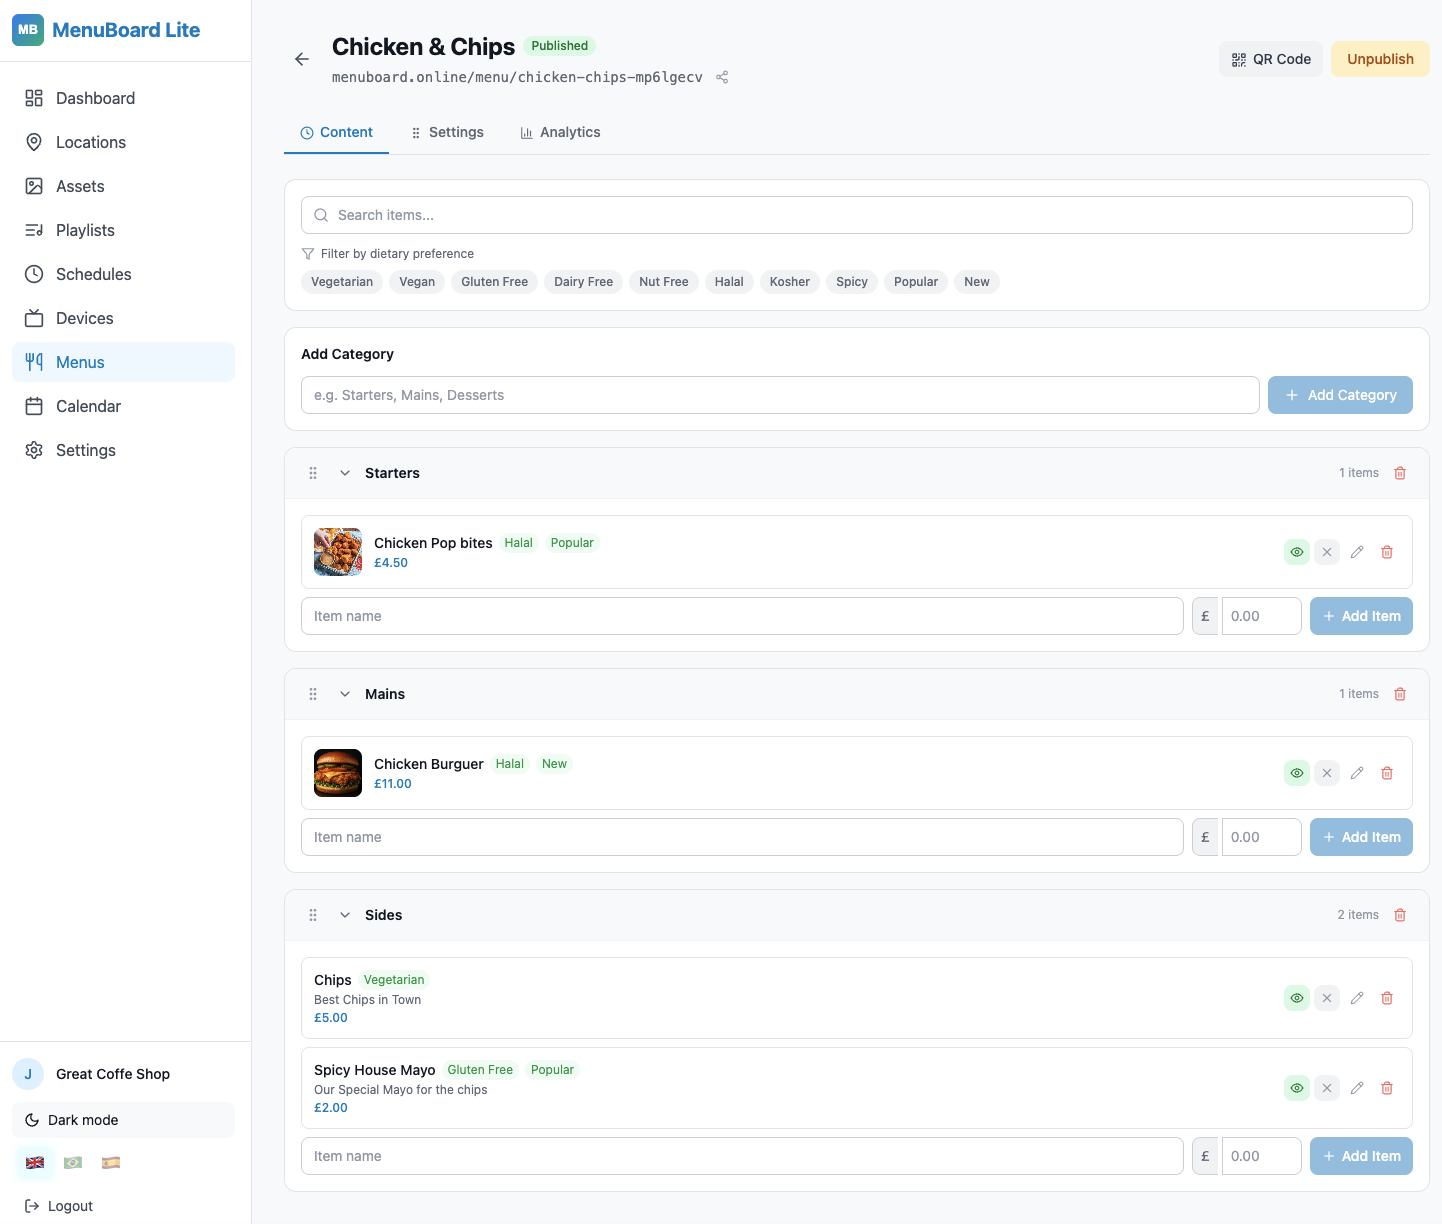
Their finished digital menu lives at a permanent link — menuboard.online/menu/chicken-chips-mp6lgecv — and is accessible to anyone with a phone. No app download needed, no login, no fuss. Customers scan a QR code at the truck or tap a link shared on social media and instantly see the full menu with categories, prices, and item photos.
When prices change, they update it in seconds. No printing, no laminating, no cost.
Step-by-Step: Creating Your Digital Menu on admin.menuboard.online
Here's exactly how to build your own, following the same flow the Menus area in the admin panel uses.
Step 1 — Sign Up for Free
Head to admin.menuboard.online and create your free account. No credit card required.
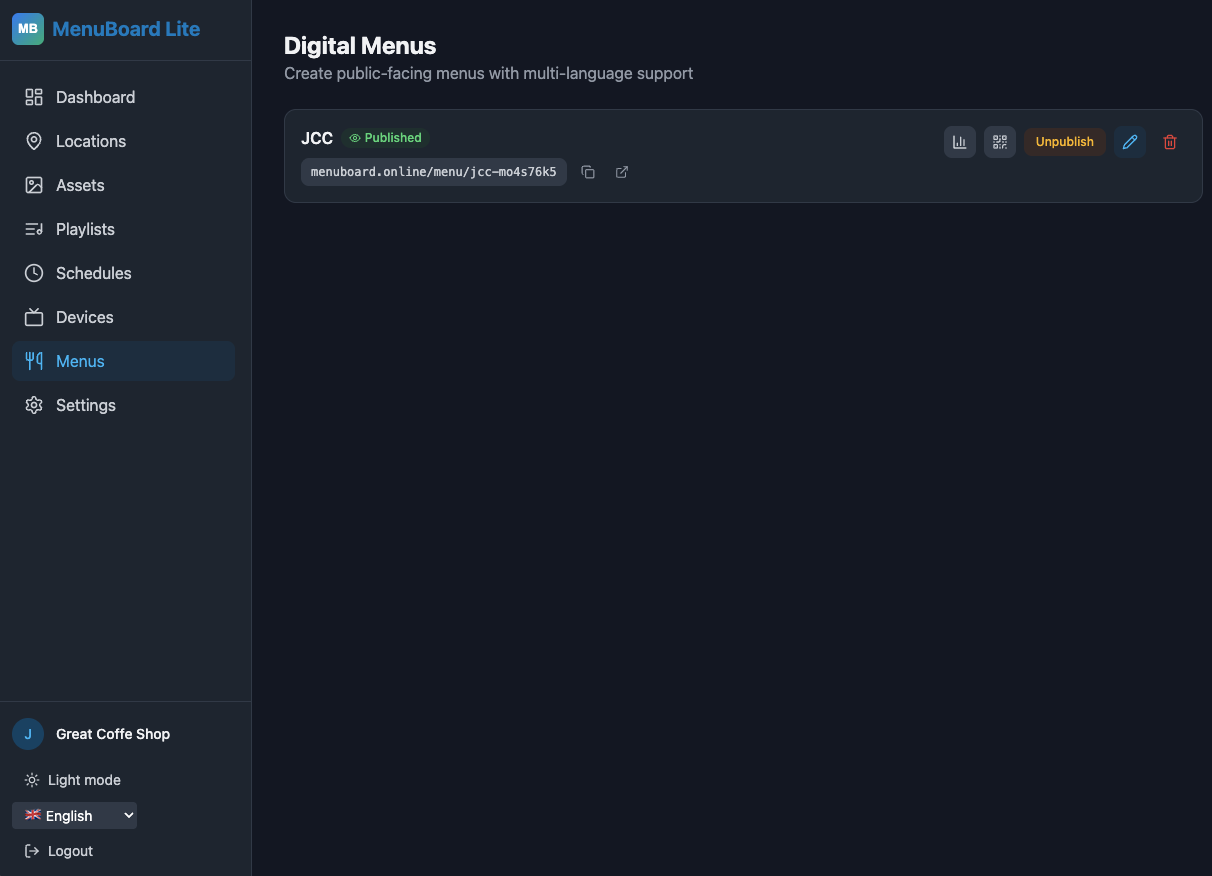
Step 2 — Go to the Menus Area
Once logged in, click Menus in the left sidebar. This is your control centre for all digital menus.
Step 3 — Create a New Menu
You'll see a "Create Menu" input at the top of the page.
- Type your menu name — e.g. Chicken & Chips Menu
- Press Enter or click the Create button
- Your new menu appears in the list with a Draft status badge
The system automatically generates a unique URL slug for your menu (e.g. chicken-chips-menu-abc123).
Step 4 — Open the Menu Editor
Click the pencil icon (✏️) next to your new menu to open the Menu Editor. You'll see three tabs at the top: Content, Settings, and Analytics.
Content Tab — Build Your Menu
This is where you add everything customers see:
Adding Categories:
- Scroll to the "Add category" field at the bottom
- Type a category name — e.g. Mains, Sides, Drinks, Sauces
- Press Enter or click Add
- Drag categories up or down using the ⠿ grip handle to reorder them
Adding Items to a Category:
- Click on a category to expand it
- Type the item name in the "Add item" field — e.g. Half Chicken
- Add the price next to it
- Click Add item
- Click the item to expand the detail editor where you can add:
- Description — e.g. Juicy half chicken, seasoned and grilled to perfection
- Photo — upload a product image (under 200 KB, JPG or PNG)
- Dietary tags — Vegan, Vegetarian, Gluten-Free, Spicy, etc.
- Availability — mark an item as unavailable or sold out without deleting it
Settings Tab — Brand Your Menu
This is where you make the menu look like your brand:
- Menu Name — shown as the heading on the public menu page
- Logo — upload your logo (PNG with transparent background works best)
- Logo Position — Left, Centre, or Right
- Header Background — upload a banner photo for the top of your menu
- Brand Colour — your primary colour used for buttons and accents
- Theme — choose between Modern, Classic, and other display styles
- Language — set the default language and add additional languages
- Availability Schedule — set opening hours per day so the menu shows as open/closed automatically
Click Save Settings when done.
Step 5 — Publish Your Menu
Back on the Menus list, find your menu and click the green Publish button.
Once published:
- Your menu goes live at
menuboard.online/menu/your-slug - The status badge changes from Draft to Published (green)
- A live link with a copy icon and an open in new tab icon appears below your menu name
Your menu is now accessible to anyone on the internet — no login required on their end.
Step 6 — Share It with a QR Code
This is the magic step. Click the QR Code icon (📱) next to your published menu.
A modal pops up with:
- A scannable QR code for your menu's public URL
- The full link displayed below the QR image
- A Download QR button — saves a high-quality PNG of the QR code
- A Share button — opens the native share sheet on mobile (or copies the link on desktop)
Ways to use your QR code:
- Print it on a small card and attach it to your truck window or counter
- Add it to your Instagram bio link or story
- Drop the menu link directly into WhatsApp groups, Google Maps listing, or Facebook page
- Put it on a chalkboard or A-frame sign at events
Keeping Your Menu Fresh
Once your menu is live, keeping it updated takes seconds:
- Price change? Click the item, update the price, done — the live menu updates instantly.
- Item sold out? Toggle the Sold Out flag on the item — customers see it struck through without it being removed.
- New dish? Add a category or item any time. No reprinting.
- Seasonal menu? Duplicate your menu, adjust it, and publish the new one when the season starts.
The Result
The Chicken & Chips truck now has a permanent digital presence. Their QR code is printed on a small card taped to the serving window. Customers scan it while they queue. They share the link in their local food truck WhatsApp groups. New customers discover the menu online before they even show up.
Zero printing cost. Zero ongoing fees on the free plan. Full control over their menu at any time.
If you run a food truck, a market stall, a café, or any venue with a menu that changes — give it a try. You can have a live digital menu, shareable link, and printable QR code in under 30 minutes.